
RH2 The Journey Best Builds: Every Position (Season 5)
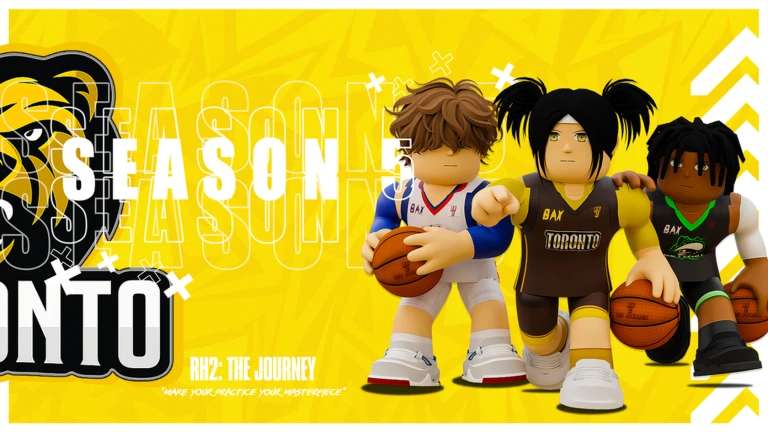
In RH2 The Journey’s Season 5 Build Creator, your height and weight decide which badge tiers you can ever reach — this guide compares the best build for every position so your Reset Tokens only get spent once.
Builds Snapshot
| Stat | Value | Coverage |
|---|---|---|
| Position Builds | 5 | Season 5 meta |
| Takeover Picks | 5 | Community-tested |
| Last Verified | August 24, 2026 | Editorial cross-source check |
Lore & Trivia
Overview
The Season 5 Build Creator decides your ceiling before you spend a single attribute point: height, weight, and wingspan cap which badge tiers a build can ever unlock. That is why the current meta (as of August 24, 2026) leans into one identity per build instead of spreading points evenly — a maxed signature stat plus the right vitals beats an all-around spread.
This page compares the best build for all five positions, explains the creator's five elements, and flags which numbers are firmly cross-confirmed versus community-reported. For the inputs these builds need to function, see the controls page; for the Reset Tokens a respec costs, see the codes page.
Related RH2 The Journey Pages
- RH2 The Journey Wiki Overview — Season 5 status, game modes, and the Park Rep ladder.
- RH2 The Journey Controls — Dribble inputs and shooting mechanics your build must support.
- RH2 The Journey Codes — Free RHC and Reset Tokens for respecs.
How the Season 5 Build Creator Works
The reworked creator has five decision layers:
- Recommended vs Custom build — recommended templates are the safe starting point; custom builds hand you point allocation across the five attribute categories: finishing, shooting, playmaking, defense/rebounding, and physicals.
- Height and weight (vitals) — the hard layer: these set attribute ceilings (see the vitals rule below).
- Wingspan — reach and physical profile; longer fits defenders and rebounders, compact fits quick guards.
- Body type — the player's physical presentation and movement identity.
- Upbringing and body frame — identity layers; upbringings are origin stories, and body frames carry hidden passive effects worth testing rather than picking on description alone.
The creator supports unusual identities — slashing point guards, seven-foot stretch centers, mobile power forwards with ball-handling — but the consistent advice across build guides is to keep one primary responsibility and one supporting strength rather than building average-at-everything.
The Vitals Rule
Vitals decide attribute ceilings before a single point is spent, and badge tiers sit behind those ceilings. If your vitals don't unlock the badge tier your build needs, no amount of attribute points fixes it. The community-tested patterns:
- Shooter builds run maximum height with minimum weight (SG: 6'7", 180 lbs) to max shooting while keeping agility playable.
- Creator guards run mid height and light weight (PG: 6'5", 170 lbs) because that combo unlocks Silver-plus badge caps across the board.
- Bigs invert the logic — max height and max weight (C: 7'1", 230 lbs), because inside scoring and defense scale with size. It is the one build family where weight is an asset rather than a tax.
Best Build for Every Position
One archetype stands out per position in the early Season 5 meta. Archetype names and vitals below are confirmed by two independent community build guides:
| Position | Archetype | Height / Weight | Signature Strength | Best Mode Fit |
|---|---|---|---|---|
| PG | Playmaking Shot Creator | 6'5" / 170 lbs | Shooting + playmaking + speed | Park, League Mode |
| SG | 2-Way Sharpshooter | 6'7" / 180 lbs | 95 three-point with HoF badges | REC 5s, League Mode |
| SF | Slashing Shooter | 6'9" / 190 lbs | Above average at everything | Park, REC 5s |
| PF | 2-Way 3-Level Scorer | 6'11" / 220 lbs | Post scoring + defense | REC 5s, League Mode |
| C | Paint Beast | 7'1" / 230 lbs | Best dunk potential in the game | Park, REC 5s |
Choosing between them is a role decision: pick the PG if you want the offense running through you, the SG if you prefer catch-and-shoot spacing with real perimeter defense, the SF for switch-everything wing play, the PF for inside-out scoring, and the C for screens, seals, and rim protection. Mobile players should favor the SG or C — both need fewer chained dribble inputs than the PG.
Attribute Targets by Position
The detailed spreads below are community-tested Season 5 starting targets that have not yet been verified in-game — treat them as starting frameworks, not gospel, and verify against your own build editor before committing. A dash means the attribute is not a priority for that build.
| Attribute | PG | SG | SF | PF | C |
|---|---|---|---|---|---|
| Close shot | — | — | — | 85 | 85 |
| Driving layup | 80 | 95 | 80 | 70 | 78 |
| Driving dunk | — | — | 88 | — | — |
| Standing dunk | — | — | — | — | 85 |
| Post control | — | — | — | 95 | 77 |
| Mid-range shot | 88 | 95 | 88 | 85 | 25 |
| Three-point shot | 85 | 95 | 85 | 82 | 25 |
| Pass accuracy | 86 | 78 | 60 | 70 | 70 |
| Ball handle | 85 | 70 | — | — | — |
| Perimeter defense | 80 | 90 | 95 | — | — |
| Interior defense | — | — | 50 | 85 | 95 |
| Steal | 84 | 78 | 67 | — | — |
| Block | — | — | 50 | 70 | 85 |
| Rebound | — | — | — | 85 | 92 |
| Strength | — | — | 60 | 87 | 92 |
| Stamina | 90 | 95 | 90 | 82 | 80 |
Two allocation warnings the guides agree on: never sacrifice stamina for a few points of passing or shooting (low stamina degrades movement, dribbling, and passing late in possessions), and spend in order — signature stat first, secondary stats second, physicals last.
Takeover and Team Boost Picks
Takeovers patch a weakness or double down on a strength; the Season 5 contest system makes the choice strategic rather than cosmetic:
| Takeover | Effect | Best On |
|---|---|---|
| Lone Ranger | Boosts three-point shooting and speed with ball | PG, SG, SF |
| Spotlight | Pure three-point boost for catch-and-shoot play | SG, PF |
| Perimeter Enforcer | Patches perimeter defense, steal, and acceleration | PG, SF |
| Matador | Mobility option when shooting is already maxed | SG |
| Gladiator | Defensive lock for paint-dominant bigs | C |
Team boosts worth coordinating with your squad: Flight Crew (teammates' vertical and driving dunk) for slash-heavy lineups, and Rolling Deep (teammates' three-point shooting and free throws) for spacing lineups. Community guides also flag Bone Collector as a PG alternative and Post Bully, Encircle, and Hivemind as frontcourt options.
Badges Worth Prioritizing
Four badges appear across virtually every meta build because they multiply value on both ends:
- Quick Draw — the consensus strongest shooting badge; mandatory on anything with a three-point rating.
- Range Extender — widens the green window from deep, enabling logo-range pull-ups.
- Clamps — anchors the 3-and-D builds that define the two-way meta.
- Pick Pocket — mandatory on guards; the difference between a steal and a blow-by.
Badge points stay fixed when you tweak attributes, so customize freely — but never drop below the tier that defines the build (for example, Hall of Fame Quick Draw and Range Extender on the SG template).
Testing and Iterating a Build
- Pick the archetype that matches your role before opening the creator.
- Lock vitals for the badge ceilings your key badges require.
- Max the signature stat, then secondary stats, then physicals.
- Pair a takeover that patches the build's one weakness with a team boost that fits your squad.
- Play several park sessions before finalizing — judge the build by ordinary possessions, not one highlight.
- Keep at least one Reset Token in reserve; Season 5 is in BETA and balance patches can shift the meta overnight. The codes page tracks every free token source.
Editorial verification on August 24, 2026 at 10:55 CST: I cross-checked the five position archetypes and their vitals against community build references and confirmed they agree on the archetype names and vitals; takeover and team boost names and effects match across references as well. The detailed attribute targets above are community-tested starting points pending in-game verification and are labeled accordingly — no in-game build testing was performed during that pass.
FAQ
What is the best build in RH2 The Journey?
The Playmaking Shot Creator PG (6'5", 170 lbs) is the most versatile Season 5 meta build, balancing shooting, playmaking, and speed. Pure shooters should look at the 2-Way Sharpshooter SG (6'7", 180 lbs) instead.
How does the Season 5 Build Creator work in RH2 The Journey?
You pick a recommended template or a custom build, then allocate points across five attribute categories (finishing, shooting, playmaking, defense/rebounding, physicals). Wingspan, body type, upbringing, and body frame add physical and identity layers — body frames carry hidden passive effects.
What height should a shooting guard be in RH2 The Journey?
The community-standard SG combo is maximum height 6'7" with minimum weight 180 lbs, which maxes shooting ceilings while keeping agility playable.
Are big man builds viable in Season 5?
Yes. The Paint Beast center (7'1", 230 lbs) and 2-Way 3-Level Scorer power forward (6'11", 220 lbs) dominate inside and perform well in park and REC-style play.
Which badges should I get first in RH2 The Journey?
Quick Draw and Range Extender for shooters, Clamps and Pick Pocket for defenders, and Handles for Days for primary ball handlers. Never trade away a build-defining badge tier for a small attribute bump.
What if I mess up my build in RH2 The Journey?
Reset Tokens respec your build in the Build Creator. They are scarce — the Season 5 codes grant only 5 in total — so bank them until the post-launch balance patches settle.
Change Log
- 2026-08-24: Initial publication for Season 5. Added the Build Creator breakdown and vitals rule, the best build for all five positions with community-tested attribute targets, takeover and team boost picks, badge priorities, and a six-step testing plan.
Discussion
Sign in to join the discussion.