
+1 Fat To Fit
+1 Fat To Fit Obstacle Course Guide

Master every stage of the +1 Fat To Fit obstacle course with detailed strategies for tight tunnels, tsunami waves, the 67 Kid boss, and more.
Overview
Guide Details
Related Pages
- +1 Fat To Fit Wiki — Complete game reference covering all systems
- Beginner's Guide — Start here for progression fundamentals
Overview
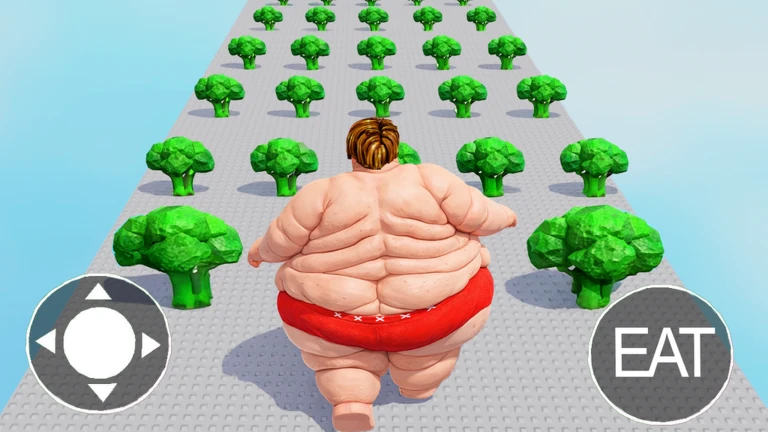
The obstacle course is where your fitness transformation gets put to the test. Your accumulated Fit Level directly translates to movement speed, which determines whether you can clear each stage or get knocked back by obstacles.
Every stage completed or checkpoint reached awards Wins. At each checkpoint, you face a critical decision: bank your current Wins safely through a cash out, or push forward for potentially greater rewards while risking everything if you fail.
Understanding each stage type, their speed requirements, and the right survival tactics is the difference between consistent Wins and frustrating resets.
Last verified: April 20, 2026
Understanding the Cash Out System
Before diving into stage strategies, understand how the reward system works.
Each stage or checkpoint offers two choices:
| Option | Effect |
|---|---|
| Cash Out | Bank your accumulated Wins and end the run safely |
| Continue | Push deeper for potentially greater rewards but risk losing progress |
Recommended approach for beginners: Cash out at the first or second checkpoint until you consistently reach your desired stage. Consistency beats gambling for uncertain rewards.
When to push deeper: When you have high Fit Level, have already unlocked valuable food tiers, and can comfortably clear stages you have attempted before.
Stage 1: Tight Tunnels
Difficulty: High (for beginners), Low (for experienced)
What Happens
Narrow tunnel sections require your character to squeeze through small crevices. Early in the game, your character is too large from accumulated fat to fit through, making these sections impossible regardless of skill.
Strategy
- Grind more Fit Level first. Your character visually transforms as you progress — chubby players literally cannot fit.
- Return after rebirths. After multiple rebirths, your base speed increases permanently, making these sections trivial.
- Do not attempt technique workarounds. There are no shortcuts for insufficient size transformation.
Key Threshold
You need sufficient Fit Level for your character to slim down enough to pass. There is no specific numeric threshold — test by attempting and dying, then grinding more in the lobby.
Stage 2: Tsunami Waves
Difficulty: Medium
What Happens
Large tsunami waves sweep across the course at regular intervals. Contact with the wave kills you instantly and resets your run.
Strategy
- Identify wall crevices immediately. When you enter the section, look for small alcoves or crevices in the walls on either side.
- Hide in the crevice. Stand inside the wall indentation until the wave passes completely over you.
- Time your sprint. After the wave retreats, you have a brief window to sprint across. Do not delay.
- Repeat for subsequent waves. Multiple waves may appear in sequence.
Timing Tip
The wave sweep is predictable once you have seen it once. Watch the pattern before committing. Some players die intentionally the first time through just to learn the timing.
Stage 3: The 67 Kid Boss
Difficulty: Low to Medium (at speed), High (at low speed)
What Happens
A large, slow-moving boss character called "67 Kid" chases you down the course. He is not particularly fast, but at low Fit Levels he can still catch and kill you.
Strategy
- Use your speed advantage. Once you have decent Fit Level, you will outrun him easily.
- Hug the side walls. The 67 Kid has a wide turning radius. By staying along the edges, you can slip past him without direct confrontation.
- Do not stop moving. Any pause gives him a chance to catch up.
- At high rebirth counts, you will outrun him so easily that he becomes irrelevant.
Key Insight
The 67 Kid is a beginner gate. If you are dying to him repeatedly, do not look for better dodging technique — grind more Fit Level until your base speed surpasses his.
Stage 4: Ice Cream Trucks
Difficulty: Medium
What Happens
Ice cream trucks drive across your path at varying speeds. Getting hit by a truck kills you instantly.
Strategy
- Move steadily, not blindly. Many players panic and sprint randomly into truck paths.
- Read the truck paths. Watch the trucks for a moment before moving. They follow predictable routes.
- Time your movement. Walk or jog at moderate pace rather than sprinting in random directions.
- Maintain forward momentum. Keep progressing forward while dodging laterally as needed.
Common Mistake
Panic-sprinting causes many players to run directly into truck paths they would have missed by moving calmly. Observation beats reaction.
Stage 5: Treadmill Stages
Difficulty: Medium
What Happens
Moving treadmills push you backward if you do not move faster than their conveyor speed. Standing still pushes you into hazards or off the course.
Strategy
- Match or exceed treadmill speed. Your movement speed must be higher than the treadmill push-back.
- Grind more Fit if failing. If you cannot make progress, your Fit Level is too low for this section.
- Do not stop moving. Even slowing down can let the treadmill push you back into danger.
- Look for safe zones. Some treadmills have brief sections where you can rest between conveyor reversals.
Stage 6: Burger and Fry Platforms
Difficulty: Medium to High
What Happens
Later stages use McDonalds hamburgers and fries as jumping platforms over hazards or gaps. You must maintain momentum while navigating these food-based obstacles.
Strategy
- Maintain momentum. Do not stop or hesitate on these platforms.
- Do not overthink gaps. The jumps are not tricky once you commit.
- Keep moving forward. The platforms are stable — hesitation causes more deaths than the gaps themselves.
- At high speed, you may need to actively slow down to avoid overshooting landing zones.
Stage 7: Coke Can Sections
Difficulty: Very High (at high rebirth)
What Happens
Coke cans appear as obstacles or platforms in advanced stages. At low to moderate speeds, these are manageable. At high rebirth counts with extreme velocity, they become the most dangerous section in the game.
Strategy
- Reduce your max speed. Before entering, open settings and lower your max speed slider to 100-140.
- At low rebirth counts, these sections are straightforward — just maintain moderate pace.
- At high rebirth counts, your character moves so fast you cannot react to the cans. Speed reduction is mandatory.
- Test and adjust. Find the speed threshold where you can reliably navigate this section.
Why This Stage Is Different
Most obstacle course deaths come from insufficient speed. Coke Can sections are unique in that they punish excessive speed. This is why the speed slider becomes critical at high rebirth counts.
General Obstacle Course Principles
Speed Is Everything
Your Fit Level determines your speed, and speed determines survival. No amount of skill compensates for insufficient Fit Level in most stages.
The solution for nearly every failure: Grind more Fit in the lobby, rebirth for permanent multipliers, then retry.
Cash Out Early and Often
The biggest mistake is gambling for big rewards and losing everything. Until you can consistently reach a specific stage, cash out at every opportunity.
Safe progression strategy:
- Play until first checkpoint
- Cash out
- Grind more Fit
- Repeat
- Once consistent, push to second checkpoint
- Eventually push for full clears
Use the Speed Slider
The custom max speed slider exists for a reason. At Rebirth 5+, your character can become uncontrollable.
Settings tip: Find the max speed value where you can react to obstacles but still clear stages you have already learned.
Death Is Not Failure
Every death teaches you something about timing, spacing, or — most commonly — your Fit Level threshold. Use deaths as diagnostic information rather than frustration.
Stage Difficulty Summary
| Stage | Beginner Difficulty | Key Factor |
|---|---|---|
| Tight Tunnels | Very High (early) | Character size transformation |
| Tsunami Waves | Medium | Timing and positioning |
| 67 Kid Boss | Low-Medium (high speed) | Raw speed stat |
| Ice Cream Trucks | Medium | Panic control |
| Treadmill Stages | Medium | Speed stat threshold |
| Burger/Fry Platforms | Medium-High | Momentum maintenance |
| Coke Can Sections | High (high rebirth) | Speed slider usage |
FAQ
What Fit Level do I need to clear the full obstacle course?
There is no fixed threshold. After 5+ rebirths with good food and table multipliers, most players can clear everything. Early game, even reaching Stage 3-4 is an accomplishment.
Should I attempt the obstacle course early or focus on grinding?
Grind first. Attempt the obstacle course when you feel your character has visibly slimmed down and your speed has increased noticeably. Early attempts at full course runs are mostly learning experiences.
Why do I keep dying to the same stage?
If technique is not the issue — and it usually is not — you need more Fit Level. The stage is gated by your stats, not your skill. Return to the lobby, eat better food, find a higher table, rebirth if ready, then retry.
Is there any way to skip difficult stages?
No. All stages must be cleared in sequence. If you cannot pass Stage 2, you cannot reach Stage 3 regardless of skill.
What happens if I die in the obstacle course?
You lose all accumulated Wins from that run and respawn in the lobby. Your Fit Level and food upgrades are unaffected — only unpersisted run progress is lost.
Change Log
- 2026-04-20: Initial guide publication.
About the author
Learn how RoboLibrary verifies and updates content in our editorial policy.